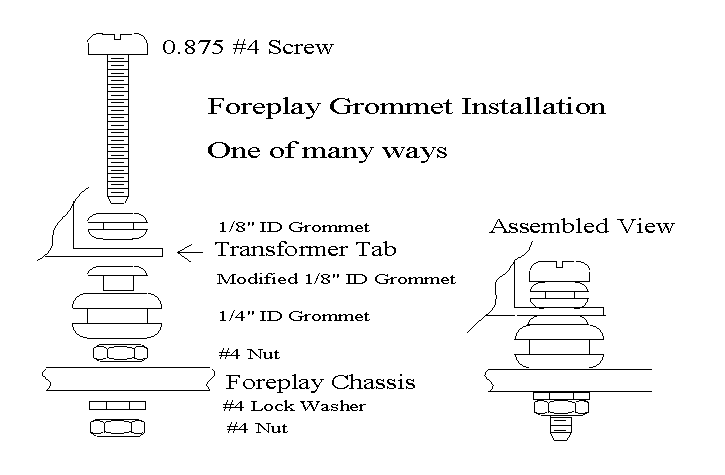
Adjust the top #4 nut so that the bottom of the nut
is flush with the bottom of the 1/4" ID Grommet before putting the
transformer into the chassis holes. The bottom nut can be torqued down
as hard as you want and the top will stay as loose as you
desire.

I haven't figured out how to ground the chassis of the transformer with this technique, yet. Since the bottom nut holds the fuse holder, I wanted that nut to be tight more than I wanted the chassis of the transformer grounded.
I wonder if the transformer tab will take solder if it is sanded and RMA flux is used? I'll update this page when I figure it out.
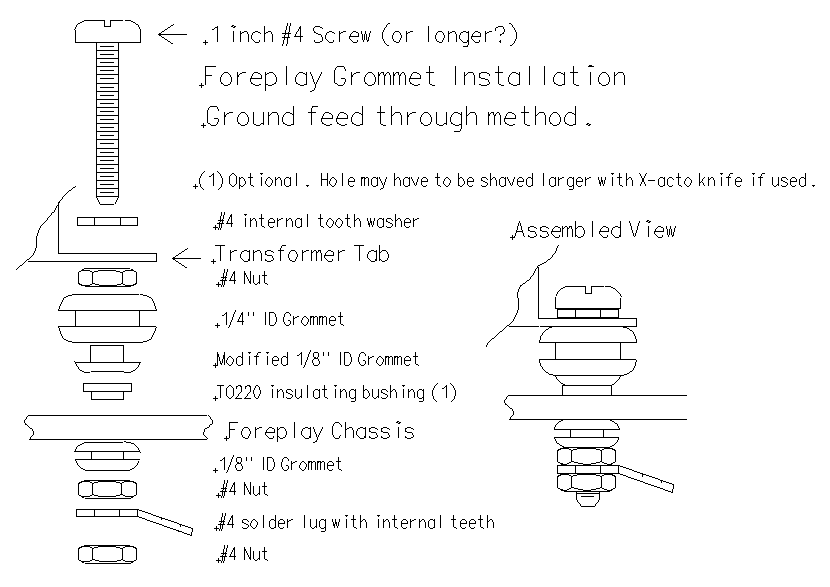
I have an idea on how to attach a ground to the Foreplay transformer and still have the transformer standing on grommets:
1. On one transformer mounting hole install the grommets as shown above.The TO220 insulating bushing (optional) is used if you wish to keep the safety ground of the transformer from touching the chassis. This is useful if you are trying to precisely control where chassis attaches to safety ground. If you install a bushing on the hole used for grounding, you may want to install a bushing between the transformer tab and the modified 1/8" ID grommet on the un-grounded hole to keep the bottom of the transformer closer to parallel to the chassis surface.
2. On the other hole install the grommets as shown below.NOTE: Solder a wire to the solder lug BEFORE you put the solder lug on the screw. The heat from soldering may melt the grommets.
I have not tried this yet. My guess is the screw will have to be 1 inch long to work.
 .
.
 ( New
2024 index page.)
 _( Old 2003 index page.)
 _( AMP Second index
page.)
 ( Fancy index page.)